 No Junk mail. No spam Calls. Free quotes


Table of Contents
Quality home design is all about accents, and one of the simplest accents to implement in order to elevate your kitchen or bathroom design is a backsplash. Now there are two ways of approaching this project, with one being significantly easier and less time-consuming.
The easier application of a backsplash involves adhesive matting, rather than mastic or thinset mortar, but for now we'll focus on the traditional way. The drawbacks of the adhesive matting are that it’s about 4 times the cost of using mortar and that the mat limits tile options due to weight limits.
[get_quote]
Additionally, mortar or mastic applications tend to produce a stronger hold than the mats, but obviously the mats shave days off installation and improve precision and placement of the tiles.
How to Install a Tile Backsplash
We’ll break down the traditional installation of a tile backsplash for those looking to do it the hard way or who plan to hire a professional and want to better understand the process.
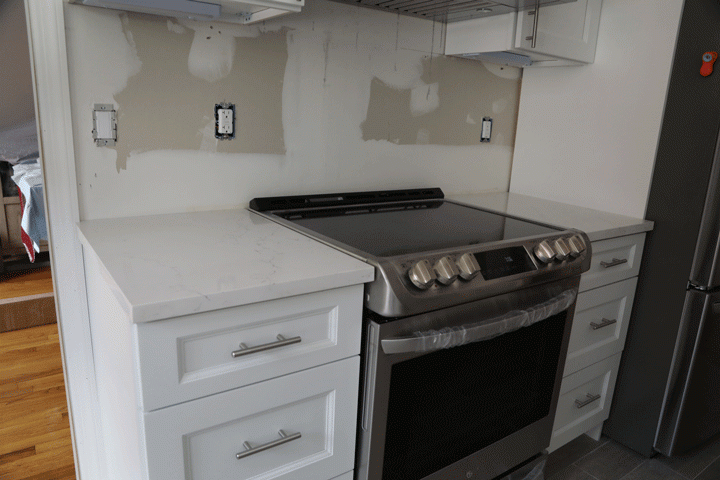
Clean and Prep the Wall
Unsurprisingly, the first thing you’re going to want to do is remove any switch plates and outlet covers, as well as turn off power to those outlets (particularly if you’re going the DIY route). Next you’re going to want to tape off your borders, establishing a clear edge line for where your tile backsplash will start and end.
Once you’ve taped off your target work area, take 80-100 grit sandpaper and gently roughen up the area you intend to install your backsplash on. This is important if you decide to go with mastic over thinset, but generally speaking, this process will create a better bond between your adhesive, the wall, and the tile.
After sanding, wipe down the wall to remove any dust or residue. Before moving on to the next stage, make sure you draw a center line in the middle of the area you plan to install the backsplash. In a lot of cases the focal point tends to be the stove, but depending on your space, that could vary. Either way, identify the focal part or center and create a vertical mark to work off of later.
This would also be a good time to lay out your tile backsplash dry to get an idea for any cuts you’ll have to make on the tile, and to ensure it fits. Lay out, measure, and cut your tile to avoid scrambling after you’ve already applied the mastic/thinset.
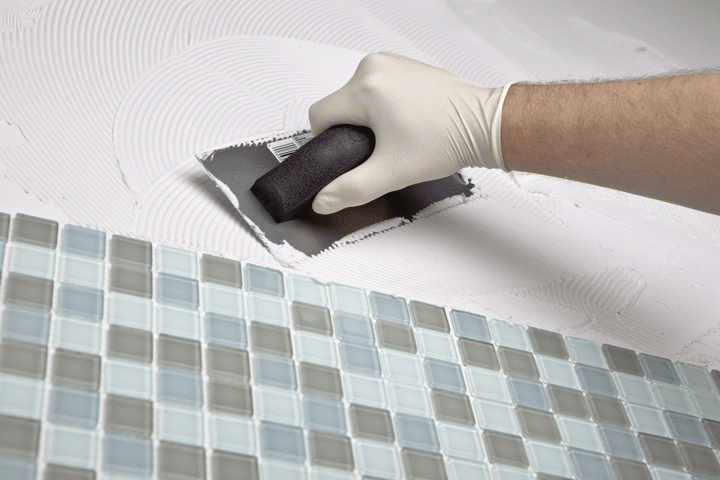
Apply the Mastic or Thinset Mortar
Ultimately, mastic and thinset each come with different considerations when embarking on a backsplash project. If you’re working in a bathroom, it is wise to go with thinset as it doesn’t allow for mold growth and isn’t susceptible to water damage, whereas mastic is. So a simple rule to follow here is mastic for the kitchen and thinset mortar for bathroom tile projects.
For the sake of simplicity, let’s work with mastic. Unlike thinset, there is no mixing required and, compared to thinset, there is less of an urgency when applying the tile after the mastic has been applied. The downside is that one must wait 24 hours for the mastic to set before grout can be applied.
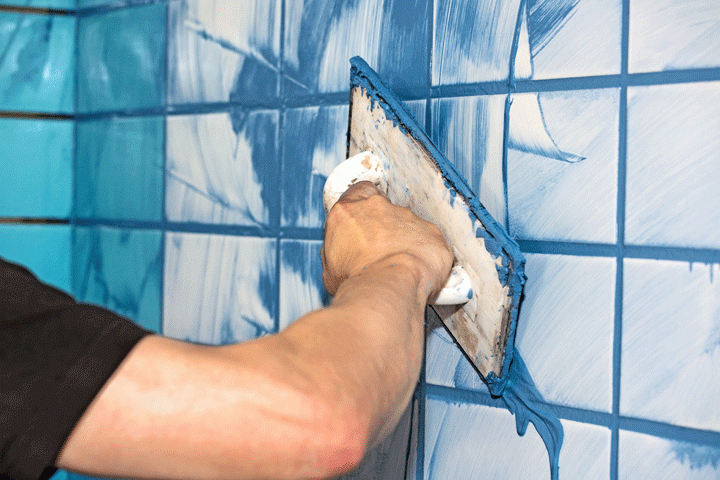
Nevertheless, use a V-notched trowel to apply the mastic to the target area, using a sweeping motion to cover an area large enough for one section of tile. Make sure to leave a small gap between the bottom line of the tile and the counter top, which will be caulked later.
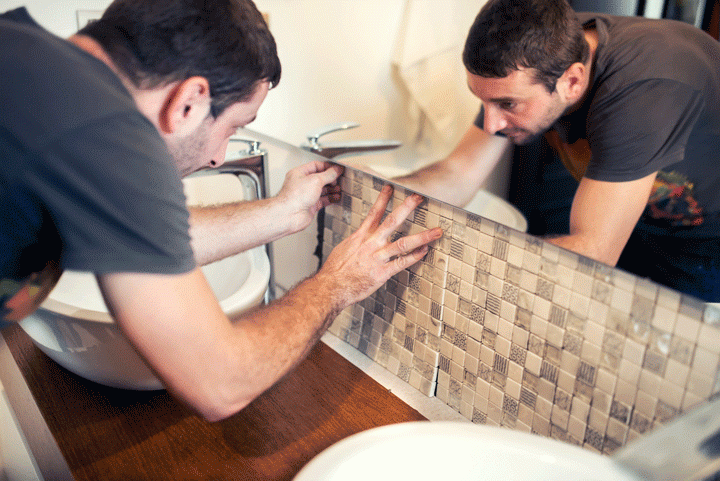
Set the Tiles
Begin setting tiles by setting the first tile off of the vertical center line you drew earlier. Firmly press the tiles into the mastic using a rubber float. Place tiles in both directions from that initial tile, and try to be mindful of the small gap between the bottom line of tiles and the countertop. Do not fill that in with mastic or do not push the tiles flush with the top of the countertop. Again, that area will be sealed with caulk later.
Continue adding rows of tiles, moving up from the baseline of tiles placed initially, until you reach the top border of your backsplash area. If at any point the mastic develops a skin or begins to harden, scrape that section off and reapply before continuing to set the tiles. Once all your tiling is installed, it’s time to let the backsplash rest and the mastic to set and dry. This will take 24 hours.
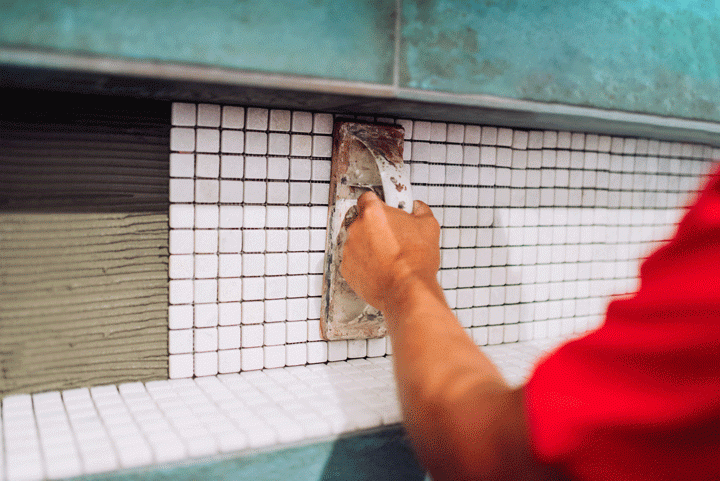
Apply the Grout
After allowing the mastic to dry and the backsplash to set in place overnight, mix up some unsanded grout (follow the directions on the bag) and apply it to your backsplash diagonally. Make sure not to fill in any of those gaps on the edges or along the top of the countertop – again, that’s to be caulked later. Depending on the type of material your tile is, you may want to apply a sealer to it prior to grouting.
[get_quote]
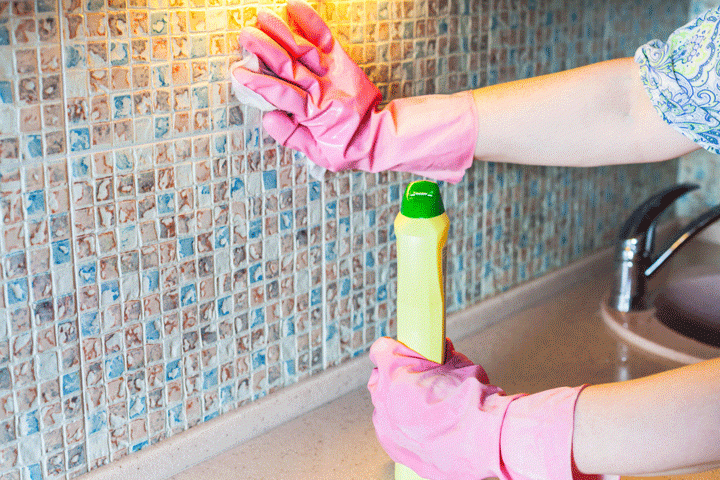
Once the grout is applied, use a wet sponge to clean excess grout off of the tiles. Wipe in a diagonal motion to avoid pulling grout out of the gaps. Then wait 30-60 minutes for the grout to set and a haze to form over the tiles. Clean again until the tiles shine.
Caulk the Seams and Clean
Finally, apply a bead of caulk to the gaps left between the tiles and the countertops and cabinets, as well as the edges. Use a wet finger to smooth out the caulk.
Once complete, give the new backsplash another wipe down and cleaning to really show it off.
Admire Your Work
Now stand back and nod approvingly as you just installed a tile backsplash the hard way. You might have spent all weekend doing it, but it’s done and your kitchen now looks better.
 Why you can trust Marble.com


 The article helped me immensely
 I’m now more informed on the subject
 I have questions about Marble.com
 The article was not accurate at all
 There is a serious lack of information
 I have questions about Marble.com