 No Junk mail. No spam Calls. Free quotes


Table of Contents
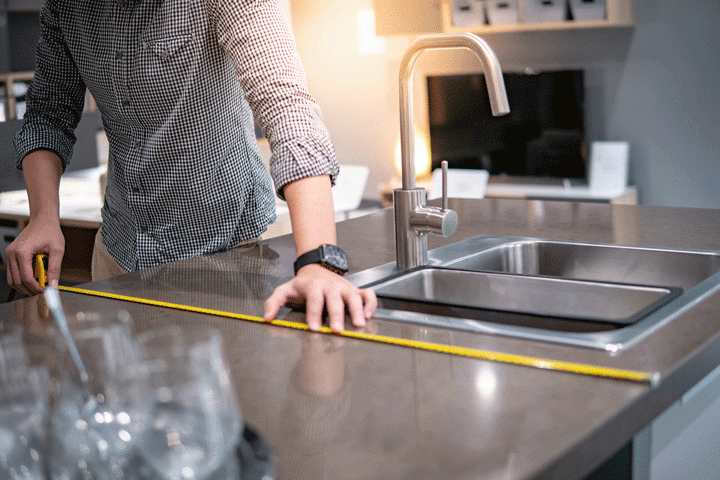
Has the time come to refresh your out-of-style kitchen or bathroom? If your room is getting a full makeover, you’ll soon notice that countertops account for a hefty portion of the project cost. Recent estimates suggest that homeowners spend between 10% and 15% of the overall kitchen or bathroom renovating budget on their countertops, as they’re one of the most prominent and highlighted features in those rooms. Knowing how to accurately estimate a price begins with learning how to measure countertops. Because it requires only few simple calculations and no specialized tools, creating your own estimate is a breeze.
What You’ll Need
Whether you are having brand new cabinets installed, or are simply replacing the countertops, accurate measurements begin with having proper supplies.
Before you begin, have the following materials ready:
-
Measuring tape
-
Paper (grid paper helps with drawing straight lines)
-
Pen or Pencil
-
Calculator
[get_quote]
Step 1: Sketching Your Layout
Sketching out your layout is a great first step, because it provides a simple, plain blueprint that you will fill out as you go.
Remember: this is a rough drawing, which does not have to be to scale. However, you should make sure to mark the following:
-
Location of the sink (undermount, drop-in, or farm sink.)
-
Location of the stove or cooktop (if it’s a stove, you will create a break in the drawing as there is no countertop.)
-
Any appliances that the countertop is up against.
-
All the edges that are “exposed,” visible edges that will be polished. (Note: the exposed edges are marked with an “X” in the drawing above, this will determine the amount of finished edge required, which factors into the overall price.)
Step 2: Measuring
Now that you have a drawing ready, it’s time to begin taking measurements. Measure the width (w) and length (l) of each piece, and mark each measurement on the sketch.
NOTES:
When measuring just base cabinets without a top, add 1.5” to the width to accommodate for overhang.
Standard width of a base cabinet is 24”.
Notice the RED piece measurement is the entire length of the countertop, all the way to the wall. The GREEN piece however is not measured from the wall, but from the turn of the countertop to the fridge.
The Island (ORANGE) has a 12” overhang.
Always measure in inches! You can convert the measurements into feet later.
Round up to the nearest inch, working with whole numbers is easier.
Many homeowners choose to have a larger overhang over their kitchen island or peninsula. The extra countertop space allows for seating or serves as a prep area. Most fabricators will recommend an overhang between 8” and 12” in these areas. An overhang over 12” will require additional countertop support.
Step 3: Calculations
Now that you have all the measurements in hand, it’s time to calculate the amount of the countertops needed. Countertop materials are sold by square foot, and to find the total amount of square feet you must calculate the area of each individual piece and add them together. Follow this simple formula:
Area = length × width
| RED Piece | 100” × 26” = 2,600 in2 |
| GREEN Piece | 70” × 26” = 1,820 in2 |
| ORANGE Piece | 36” × 72” = 2,592 in2 |
Now that we have found the area for each individual piece, add them together to find the total area.
Total Area (square inches): 2,600” + 1,820” + 2,592” = 7,012 in2
Now, convert square inches to square feet. Divide the total area by 144.
Total Area (square feet): 7,012 ÷ 144 = 48.7 ft2
The total area of the project will have the highest impact on the overall price.
Another factor will be the total edge length that will be polished (sides marked with an “x” on the sketch), which is calculated in linear feet. To calculate this number, we will add all the lengths marked with “x” on the sketch. (NOTE: RED piece polished edge area will be: 100”- 26” = 74”)
Total Edge Length (inches): 26” + 74” + 70” + 26” + 36” + 72” + 36” + 72” = 412”
Total Edge Length (feet): 412” ÷ 12 = 34.3 ft
The two numbers calculated above provide all the information necessary to receive an accurate estimate.
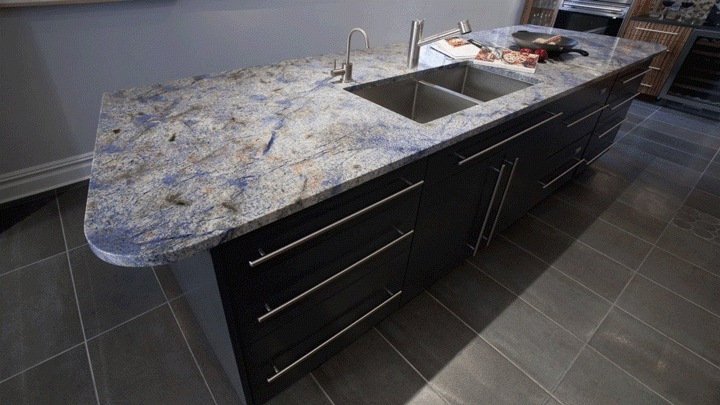
Odd-Shaped Projects
Some countertops are as easy to divide into rectangles, as we saw in the kitchen above. However, the calculations for the area are the same.
To calculate the area of the oddly shaped piece below, we will follow the same formula: Area = Length × Width
Total Area (square inches): 30” × 60” = 1,800 in2
Total Area (square feet): 1,800 ÷ 144 = 12.5 ft2
To calculate the amount of edge necessary, we will add up all the edge lengths that will be polished.
Total Edge Length (inches): 30” + 60” + 30” = 120”
Total Edge Length (feet) 120” ÷ 12 = 10 ft
[get_quote]
Measuring a Round Surface
If you have been thinking about replacing a coffee or a kitchen table top with stone – like marble or granite – you can use a simple formula to calculate the rough cost of the production of such piece.
To account for material waste, round pieces are calculated just like odd-shaped pieces.
Total Area (square inches): 36” × 36” = 1,296 in2
Total Area (square feet): 1,296 ÷ 144 = 9 ft2
Adding a Backsplash
Most homeowners consider a backsplash that compliments the countertops and keep their walls protected from accidental spills and everyday wear and tear.
Using the formula Area = Length × Width, you can estimate the amount of stone necessary to cover either the entire backsplash or a short backsplash.
Determine which walls will have a backsplash, and mark them on your sketch. If you are considering a short backsplash, multiply the length of the countertop by the desired backsplash height (Note that 4” is the average height of a backsplash). After all the backsplashes are measured, add the areas together. Don’t forget to divide the total number by 144, to get the total number of square feet.
Applications Around the House
The simple formula used here can be helpful when determining quantities of materials for other projects around your home. For example, if you are calculating the amount of tile necessary to cover a floor or a backsplash, use this formula and add 10% for waste. Any material that is sold by the square foot will use this formula, so make sure to account for waste where applicable.
Estimating the Cost
The area and length edge of the countertops are the two single most important factors fabricators use to determine the price of the project. However, there are several other elements which can add to the price tag of the project you should consider.
Cutouts for a sink may have different costs, depending on the sink you have selected for the job. Undermount sinks will have the highest price tag, while drop-in will likely cost under $100 to install. Oversized pieces or materials that are difficult to the installation site may also have an effect on the price.
Ask the fabricator which factors they consider when creating their own estimates. Having the price breakdown helps greatly when purchasing new countertops.
[get_quote]
Templating
Your countertop measurements are a great guideline for estimating costs and providing the fabricators with general clues about the project they are undertaking. Once the fabricator of your choice is selected, the next step is templating. Templates are exact measurements of the project are taken on site by a trained technician. The countertop is fabricated based on those measurements and final project price is calculated at that time. Keep in mind that the price may slightly deviate from an estimate, based on additional footage or features on the countertop.
Tips from the Pros
Always leave the exact measurements up to the pros. They’ll suggest the best placement of overhangs, heights of backsplashes, and will be able to assist with any unusual projects that you might find around the house. While some small projects might be considered to be DIY, remember that stone is very heavy and even small pieces, such as vanities, can weigh well over 100lbs. Seams might not always be avoidable, even if there is a stone large enough, due to heights of doors or shapes of the room. Call us with any questions and we’ll be sure to answer them!
 Why you can trust Marble.com


 The article helped me immensely
 I’m now more informed on the subject
 I have questions about Marble.com
 The article was not accurate at all
 There is a serious lack of information
 I have questions about Marble.com