 No Junk mail. No spam Calls. Free quotes


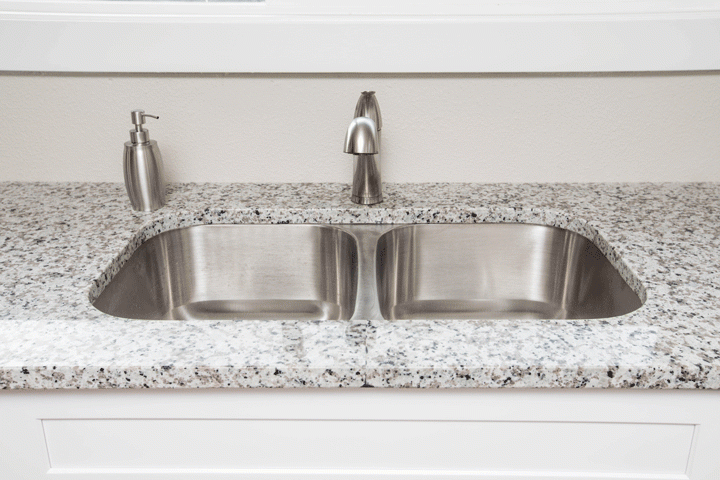


Table of Contents
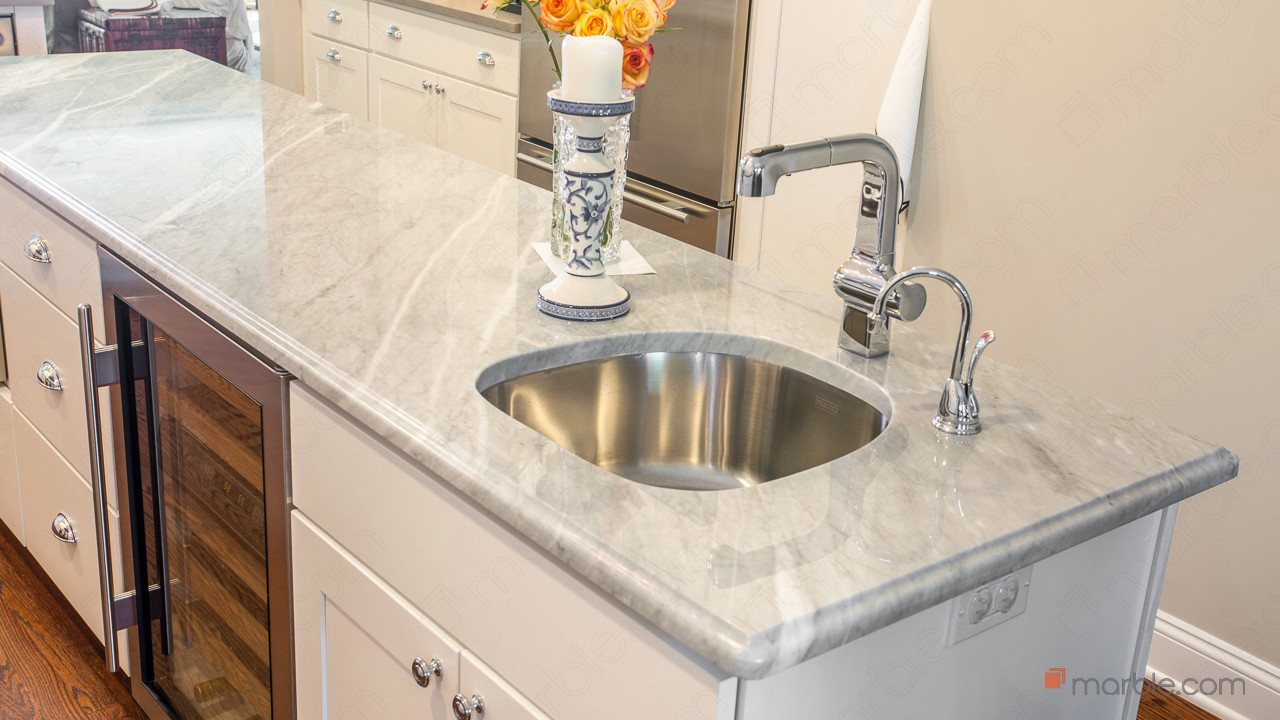
If you’ve decided to break away from the traditional sink install, and instead are opting for an undermount sink, there are some key things to know beforehand. First off, providing your countertop fabricator with factory specs of your new sink will be crucial. After all, you shouldn’t be cutting the hole for your sink yourself, especially if you’ve decided to install natural stone countertops.
Maybe you’ve spent the last decade as a general home contractor and feel confident you can do this install from start to finish. The thing is, most stone fabricators have highly specialized tools for cutting stone, and if you don’t have such tools, no amount of experience will make up for it.
So step one is picking out your sink before you have your countertops cut and installed. This will allow you the time to get the sink specs to your stone fabricator, which will result in the delivery of a precut slab ready for your specific undermount sink.
With your slab ready to have the undermount sink anchored to it, you can either go for the DIY route or hire a contractor. While installing an undermount sink to a precut stone slab is certainly doable for someone with minimal experience, the benefit of hiring a contractor is that they have likely done the job dozens to hundreds of times. Precision is key to this project, to ensure no leaks or no surprise incidents in which you find your sink in the bottom of your cabinet.
[get_quote]
How to Install an Undermount Sink
We’ll walk through the process of installing an undermount sink below, either for personal reference ahead of a DIY project or a better understanding of the job to guarantee you hire the appropriate contractor for the work.
Remove Dust and Clean the Area
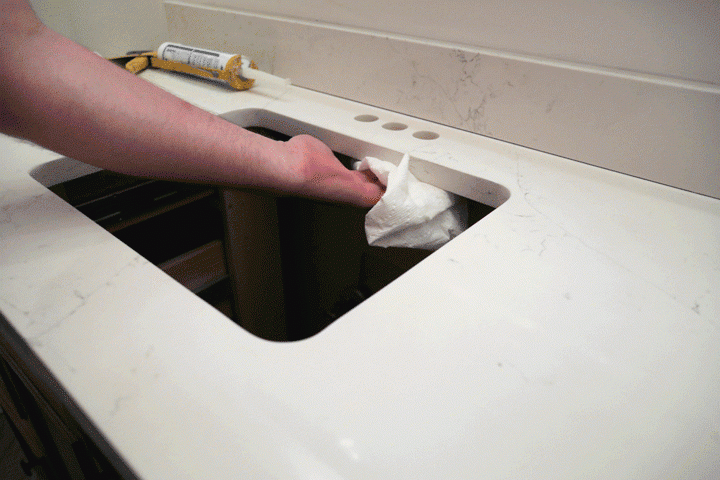
Since most undermount sink installs require epoxy to secure the clips, having a clean and dust-free surface is vital to ensuring the epoxy bonds properly with the stone countertop. In the event you opt to cut grooves that will have a clip held into them with a screw, you’ll still need to clean the area where silicone caulk will provide the watertight seal between the sink and counter.
The easiest way to ensure your work area is dust-free is to first wipe down the areas around the precut hole with a dry cloth and then a damp cloth. This will ensure no matter what that all dust and dirt has been removed, and that your counter is ready for silicone and epoxy.
Prepare to Install the Sink
This next phase depends on whether you want to install the sink with the countertop already in place or if you want to attach the sink to the countertop and then install it all in one shot. Doing the install once the countertop is installed really depends a lot on the size of your under sink cabinets. In many cases you’ll have to drop the sink in before putting the countertop down, and in others you’ll be able to finagle the sink in through one of the cabinet doors.
Now pre-installing the sink will likely be the easiest option, as you’ll rely on gravity to attach the sink rather than clamps. Regardless of when you decide to attach the sink, the process will remain relatively the same.
Attaching the Sink Under the Counter

We’ll focus on the more difficult and involved install, which is installing the undermount sink after the countertop has been set in place – the other option is simply a couple less steps. For this you’ll need a 2x4 longer than the width of the cutout for the sink as well as one or two clamps, depending on if your sink is a double or single bowl.
Once the sink is resting in the cabinet below the cutout in the countertop, what you want to do is lay the 2x4 across the cutout. Then lift the sink up to the cutout from below and secure in place with the clamps by attaching one end underneath the drain hole(s) and one to the 2x4.
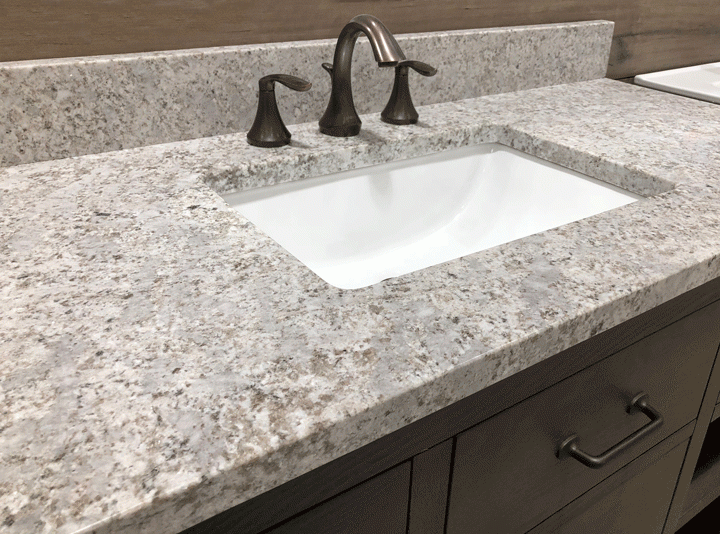
While positive and negative reveals are options, the only option you should go for is the flush mount reveal in which the edge of the sink is aligned with the edge of counter cutout. The reason why is obvious: a positive reveal will create more areas that will need cleaning while the negative reveal will guarantee you chip part of your countertop pulling a pan out of the sink. A flushmount or neutral reveal will make life and cleaning a lot easier.
[get_quote]
Once the sink is clamped in place, get underneath and ensure it’s a snug fit. After you’re confident with the placement, lower the sink enough to apply silicone caulk around the rim of the sink. Then crank the sink flush against the countertop, lock the clamps, and let the caulk dry.
Finalizing the Undermount Sink Install
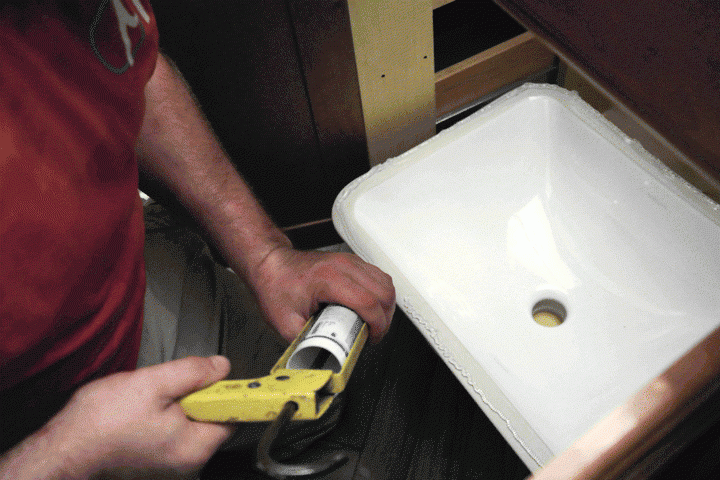
Now that the sink is locked in place with clamps as the silicone dries, it’s time to add the metal clamps that will make sure the sink is locked in place for as long as it will be in use. To do this, you’ll need a two-part epoxy and special clamps with multiple holes cut into the mount.
Apply the epoxy around the corners of the sink and then quickly press the metal mount into the epoxy so that it oozes through the holes. Make sure the mounts are positioned correctly so that they lock over the edges of the sink. Once the epoxy dries, your undermount sink is good for use. Now remember, you’re looking at about 24 hours before all the appropriate compounds set completely. Even if the epoxy and silicone look dry, don’t expose them to water until after 24 hours.
After all, undermount sinks can last a lifetime if installed properly, so don’t let impatience ruin your sink and cabinets all because you wanted to play with your new sink sooner than you should’ve.
 Why you can trust Marble.com


 The article helped me immensely
 I’m now more informed on the subject
 I have questions about Marble.com
 The article was not accurate at all
 There is a serious lack of information
 I have questions about Marble.com